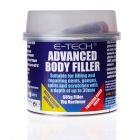


E-TECH Fibre Reinforced Hole Bridging Filler– 400g
Price:
Availability:
The E-TECH Fibre Reinforced Hole Bridging Filler has been developed for bridging holes, splits & cracks in body panels & bumpers. Perfect for filling rust damaged areas and rust spots and give structural strength to any repair.
Provides a secure platform to build up layers of body filler for a smooth surface finish. Impact resistant fibres fast setting and waterproof and can be used on steel or alloy body panels, plastic bumpers and glass fibre (GRP)
Features:
- Gives structural strength to any repair
- Ultra-strong adhesion to bodywork
- Impact resistant, fast setting and waterproof
- Provides a secure platform to build up layers of body filler for a smooth surface finish
- Perfect for filling rust damaged areas and rust spots
- Can be used on steel or alloy body panels, plastic bumpers and glass fibre (GRP)
-
400g filler is made up of 390g Fibre Reinforced Filler and 10g Hardener
-
Fibre reinforced Putty Colour – Light Green
-
Can be used as a general purpose filler on steel or alloy bodywork, most plastics, glass fibre (GRP), wood and masonry
-
Manufactured in the EU in accordance with ISO9001 & ISO14001 quality standards
PREPARATION
• For best results ensure the bodywork or part you are working on and the FR Filler are at room temperature before you start the repair (approx 17°C to 21°C).
• For best results apply in a warm, dry, dust free, well ventilated area.
• Remove any loose paint, rust and flakes or debris from the damaged area.
• Sand the damaged area thoroughly along the edge of the hole, crack, split or dent. Feather* the edge back into the good paint about 25mm using a medium grade abrasive paper.
• If you have a hole in the body panel you must cut out or grind away any rust and then knock back the edges to round them off so they are not sharp.
• For larger holes you may need to bridge the gap with an alloy mesh and apply the Fibre Reinforced Filler (FR Filler) directly on to the mesh and the surrounding body panel. You can also use FR Filler to secure the mesh into position.
• Clean area to be filled/repaired thoroughly; remove all traces of dust, silicone, polish, wax, dirt, grease etc. (use a cleaner non-injurious to paint work) - we recommend using the E-TECH Technik Surface Deep Cleaner ER00102.
• For dents that are deeper than 20mm we recommend you pull/tap it out as much as possible to reduce the amount of filler you apply.
* Feather Edge – Sand the edge of a paint layer so it tapers down to the metal/plastic surface leaving no ridge or edge
APPLICATION
• Use the spreader to mix the FR Filler and Hardener to a ratio of approx a 30mm (3cm) line of Hardener, to approx a 40mm (4cm) diameter ball of FR Filler (golf ball size). (This is a ratio of approximately 3-4% hardener to 96-97% FR Filler). Mix until you have a consistent colour. Try not to create air bubbles when mixing the two components. (Once mixed the FR Filler will start to harden within a few minutes so we advise you only make up an amount that can be applied within this workable timescale).
• Apply the FR Filler evenly in several thin layers, about 5mm to 6mm thick, allowing each layer to harden before applying the next layer. (This helps reduce the formation of voids and air bubbles ensuring a good adhesion).
• The final layer should be 1mm or 2mm lower than the desired level to allow room for a layer of smooth surface body filler. We recommend the E-TECH Advanced Body Filler Part No ER00103/ ER00104.
• Allow the FR Filler to fully cure/harden for approx 30 minutes at room temperature. It may take longer to cure in cooler temperatures or if the correct ratio of FR Filler to hardener is not exact.
• Use a coarse grade abrasive paper to remove any excess FR Filler from the repaired area and smooth out any rough edges that may stand proud.
• Ensure the FR Filler is completely cured/hard and dust free.
• You can now apply the body filler over the FR Filler following the instructions of how to use/apply the body filler. This will give the repair a smooth surface finish.
• Once the body filler has cured and you have sanded and shaped it the repair is now ready for priming.
• For priming we recommend the E-TECH Technik Repaired Surface Primer, Part No ER00109; follow the instructions on the can.
• Once you have primed the damaged area you can apply the top coat of paint.
TOP COAT OF PAINT
We recommend that you find the manufacturer's colour code for your vehicle which will be on the VIN plate/chassis plate (refer to vehicle owner's hand book to locate this information) or you could ask your local dealer for your paint colour code. Contact a good local motor factor who mixes paint on their premises and they will be able to provide you the exact colour match in an aerosol for DIY application (use).