

E-TECH ALLOY WHEEL REFURBISHMENT KIT - Silver
Price:
Availability:
The E-TECH Alloy Wheel Repair Kits have been developed to achieve a professional wheel refurbishment at a fraction of a price!
It's so easy to damage your alloy wheels and expensive, inconvenient and time consuming to get them refurbished.
However, E-TECH Engineering has come up with a solution for repairing deep scuffs, scratches and kerb damage to the wheel rim and most other superficial non-structural damage. This kit provides all the components you need to repair your alloy wheels yourself and contains detailed instructions of how to achieve a professional finish that is virtually invisible to detect.
So if your alloys are damaged and looking second hand, for a small investment in time and money you can dramatically improve their appearance and the value of your car.
E-TECH Complete Alloy Wheel Repair Kits are available in a choice of 5 popular colours
The Complete Alloy Wheel Repair Kits are available in a choice of 5 colours: Metallic Silver, Motorsport Black, Competition White, Technik Grey and Drift Gold
-
Kit contains:
400ml tin of E-TECH Alloy Wheel Clear Lacquer
400ml tin of E-TECH Alloy Wheel Spray Paint
10cm tube of E-TECH Alloy Wheel Putty
Applicator
Masking tape
Pair of gloves
5 Diamond files
3 sheets of sandpaper (Coarse x1/Medium x1/ Fine x1)
Flexi wheel rim shield
2 Degreasing sachets
Detailed instructions
Make sure you read the warnings/cautions below.
• For best results we recommend that this kit and the components contained inside it are used inside in a warm garage, shed or workshop which is well ventilated and has a minimum temperature of about 55°F (13°C).
• We recommend that you remove the wheel which needs repairing from the vehicle. However, it is not always necessary to do this but we have found it makes life easier. Please refer to vehicle manufacturer's handbook to ensure safe removal of the wheel.
• This kit is designed to repair surface damage to alloy wheels only. It is not designed or recommended for structural wheel repair.
PREPARING THE WHEEL FOR FILLING
1. Clean the complete wheel using a good alloy wheel cleaner and make sure you remove
all traces of brake dust, dirt, wax, polish, silicone etc. Then wash the wheel with warm
soapy water and rinse thoroughly
2. Remove any loose flakes of lacquer and protruding bits of alloy from the damaged area.
Lightly sand and file around the damaged area using the 600 grade sandpaper and
appropriate file if needed.
3. Clean the wheel with warm soapy water after any filing and sanding has taken place.
Dry using some kitchen towel or similar.
VERY IMP0RTANT Ensure that the wheel is completely dry and free from any polish
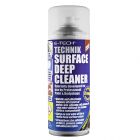
or silicone. We recommend using our E-Tech Surface Deep Cleaner (ER00102).
FILLING THE WHEEL
1. Put on the gloves which ate provided in the kit*
(*use an alternative glove if allergic to latex)
2. Cut off a cross section of E-Tech Alloy Putty using a pair of scissors. Remove the plastic
wrapper and thoroughly mix the putty by kneading between your fingers and thumb.
This should take a few minutes and once the putty is a uniform dark grey colour this
will signify that the mixing process is complete and ready to apply.
3. A flexible wheel rim shield is provided in the kit. (fig:1)This should be placed between
the wheel rim and tyre, where the damage has occurred. The wheel shield is designed to
offer an edge so that any damage to the rim can be filled and also to prevent the filler
getting between the wheel rim and the tyre.
4. Apply a generous amount of putty to the damaged area and shape using fingers or the
wooden applicator provided. (fig:2) lf required the putty can be smoothed with a wet finger
or damp cloth prior to hardening.
5. Remove any excess putty immediately and allow putty to cure for about one hour.
(When applying putty to an area that comes into contact with the wheel rim shield we
recommend that you leave it in place until the filler is cured - approximately 1 hour - and then
remove the shield). After this time the putty will have set quite hard; you can then start to file,
sand and shape the putty so it sits flush with the wheel and covers the damaged area. (fig:3)
6. Start by using the coarse file and sandpaper provided to get the filler level with the wheel
and then work your way down using the appropriate file and finer sandpaper so a smooth
finish is achieved. Take care to shape the filler so it matches the contours in the wheel
ensuring there are no sharp edges that could damage the tyre.
7. 0nce you have filled and shaped all the damaged areas clean the complete wheel again
removing all filler dust using warm soapy water and rinse thoroughly. Dry wheel thoroughly
and leave for a little while to make sure all moisture is removed (using the aid of a hairdryer
or hot air gun will speed up this process). Finally wipe with the degreasing sachets supplied to
ensure all traces of silicone and oil residue are removed from the area to be painted. Paint will
not adhere to dirty or dusty surfaces - please remember this when preparing the wheel.
PAINTING AND LACQUERING THE WHEEL
. Mask around the edge of the tyre where the side wall meets the wheel rim with small strips of masking tape provided in the kit.
. Place sheets of newspaper around the tyre and tape it to the masking tape.
. Ensure tyre is not showing through as the overspray will colour the tyre when you spray the wheel.
. Mask any areas that you do not want to paint, i.e. tyre valves, wheel centre caps, nuts/bolt
holes/heads etc.
The wheel is now ready for Priming
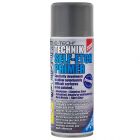
. ln some cases where there are large areas of exposed alloy (bare alloy), we recommend
that you use an Etch Primer (E-Tech Technik Self-Etch Primer - ER00112) to ensure that
the paint will adhere to the alloy.
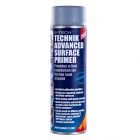
. lf you have had to use an Etch Primer because you have a large area of exposed bare alloy,
we do recommend that you then use a good quality Repaired Surface Primer. This will help
with the adhesion of the top coat and provide a secure foundation for it. We recommend
using our E-Tech Technik Repaired Surface Primer (ER00109)
The wheel is now ready for painting.
. Follow the preparation and painting instructions which are printed on the can.
. We recommend that you do a colour compatibility test. Spray the inside of the wheel or other small area of the wheel that will not be noticed with the paint provided so you can see the colour your wheel will be after painting. We recommend that you spray the whole wheel to ensure that the colour of the wheel is the same.*
* The can of paint provided is a standard colour. Due to the various shades and paint finishes of alloy wheels from different manufacturers we cannot guarantee a perfect match to the original wheel colour. Therefore in most cases we recommend painting the complete wheel with the paint provided to obtain a uniform colour lf you require a different shade or colour we recommend contacting
your local motor factor/shop that stocks various shades of paint. Additional cans of the paint provided in this kit are available to purchase separately.
. Holdthecanabout20-30cms (8"-12") from the surface and spray a thin layer over the filled area and the rest of the wheel using smooth strokes to avoid runs.
. Allow approx 10 minutes for the paint to dry to a tacky film and repeat paint process until you have several even light coats applied to the wheel and so that the damaged area is blended into the rest of the wheel. Shake can between applications.
. AIIow paint to fully dry before applying clear coat lacquer. . Repeat the above process for applying the clear lacquer. Remember to read the instructions on the can.
NB: We suggest that you leave the wheel f or approx 12-24 hours inside a warm garage
after painting and lacquering to allow the paint and lacquer to cure. Do not wash wheels
within three days of painting and lacquering.